


How to Build A 4×1 Timber Fence
Step-by-Step Guide to Building a Fence Using 4x1 Treated Timber and Fence Posts (UK)

Step-by-Step Guide to Building a Fence Using 4×1 Treated Timber and Fence Posts (UK)
Building a timber fence using 4×1 treated timber and fence posts is a cost-effective and relatively straightforward DIY project. This guide is designed to help UK readers build a sturdy fence that suits your garden or outdoor space, following standard practices used in the UK for timber fencing.
Materials Needed:
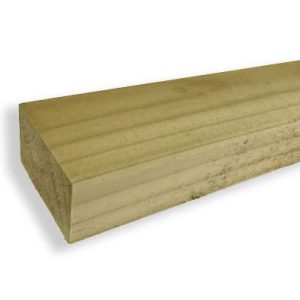
- 4×1 treated timber (for the fence boards)
- Timber fence posts (either 4×4 or 3×3, depending on fence height)
- Postcrete or concrete mix (for setting posts)
- Gravel boards (optional, for placing at the bottom of the fence)
- Galvanised nails or screws (to secure boards to posts)
- Spirit level (to ensure straightness)
- Measuring tape (for accuracy)
- Saw (to cut timber to size)
- Drill or hammer (depending on fixings used)
- String line (for aligning posts)
- Fence post caps (optional, to protect the post tops)
- Weatherproof wood stain or paint (to protect the timber)
Planning Your Fence:
- Measure the Area:
- Use your measuring tape to calculate the total length of the fence. Measure from post to post and ensure you account for gates or corners.
- Mark the locations where each post will be installed. Typically, fence posts are spaced 1.8 metres (6 feet) apart.
- Calculate Your Materials:
- Fence posts should be spaced approximately 1.8m apart. So, for example, if you need a fence that’s 10 metres long, you’ll need 6 posts (10m ÷ 1.8m ≈ 6 posts).
- Calculate how many 4×1 timber boards you’ll need. For a fence of 6ft (1.8m) high, you’ll need several 4×1 boards stacked on top of each other to reach the required height.
Step 1: Prepare the Ground and Mark the Post Positions
- Clear the area where the fence will go, removing any rocks or vegetation that may obstruct the posts or boards.
- Mark the position of each post using spray paint or stakes, spacing them 1.8 metres apart.
- Run a string line between two end posts or stakes to ensure the posts are aligned properly. This helps maintain a straight fence line.
Step 2: Dig the Post Holes
- Dig post holes that are at least 60cm (2 feet) deep for stability. The deeper, the better, especially in areas prone to high winds.
- If you’re building a taller fence, you may want to go as deep as 75cm (2.5 feet).
- The diameter of the hole should be about three times the width of the post (around 25cm wide for 4×4 posts).
- Use a post-hole digger or spade to dig the holes.
Step 3: Install the Fence Posts
- Place the posts into the holes, making sure they’re standing upright and in line with the string line.
- Set the posts in concrete:
- Add gravel to the bottom of the hole for drainage (around 5cm).
- Pour Postcrete into the hole, and add water according to the manufacturer’s instructions.
- Use a spirit level to ensure the post is straight while the concrete sets (usually takes around 10–15 minutes to harden). Adjust the post position before the concrete fully hardens.
- Repeat for each post along the fence line.
Step 4: Attach Gravel Boards (Optional)
- Attach gravel boards (if using them) at the base of the fence posts. These help prevent the bottom of the fence boards from touching the ground, which can increase longevity by reducing water exposure.
Step 5: Attach the 4×1 Timber Boards
- Cut the timber boards to the correct length using a saw (the standard fence panel width in the UK is 1.8 metres).
- Start with the first board at the bottom of the post, nailing or screwing it into place:
- Ensure that the board is level.
- Use galvanised nails or screws to avoid rust. Aim for two nails or screws per post to securely fix the board.
- Work upwards, adding each additional board until you reach the desired fence height. Keep checking for levelness as you go.
- Leave a small gap (around 5mm) between each board to allow for wood expansion and water drainage.
Step 6: Finishing Touches
- Cut the tops of the posts to a uniform height, if necessary, using a saw.
- Apply fence post caps to the tops of the posts for added protection against rain.
- Stain or paint the fence:
- Once the fence is complete, apply a wood preservative, stain, or paint to protect the timber from the elements. Choose a weatherproof finish that is suitable for outdoor use in the UK climate.
Final Considerations:
- Frost Heave Protection: Ensure posts are installed below the frost line (around 600mm) to prevent movement due to freezing and thawing ground.
- Wind Resistance: If your fence is in a particularly windy area, you may want to consider shorter post gaps or thicker timber for added stability.
- Neighbours and Regulations: Check with your local council for any restrictions or permits needed for your fence, especially if it borders a neighbour’s property. The typical maximum height for a fence in the UK without planning permission is 2 metres (about 6.5 feet).
Maintenance Tips:
- Regularly check the condition of your fence posts and boards, especially after severe weather.
- Apply a fresh coat of stain or paint every few years to maintain the timber’s durability and appearance.
- Replace any broken or damaged boards promptly to prevent further deterioration.
Building a fence with 4×1 treated timber and timber posts is a straightforward project that can transform your garden while providing privacy and security. By following these steps, you’ll be able to create a strong and attractive fence suitable for UK weather conditions.