


Guide to Building a Small Brick Wall (UK)
Tony Reynolds2024-10-04T12:49:01+00:00Guide to Building a Small Brick Wall (UK)

Guide to Building a Small Brick Wall (UK)
Building a small brick wall is a rewarding DIY project that can enhance your garden, define boundaries, or serve as a decorative feature. This guide provides step-by-step instructions tailored for UK readers, focusing on the tools, techniques, and materials commonly available in the UK.
Materials and Tools Needed:
- Bricks (standard UK size: 215mm x 102.5mm x 65mm)
- Cement (for mortar mix)
- Building sand (soft sand for the mortar mix)
- Lime (optional, for flexibility in the mortar)
- Water (for mixing mortar)
- Shovel (for mixing the mortar)
- Spirit level (for ensuring levelness)
- Brick trowel (for spreading mortar)
- Pointing trowel (for finishing the joints)
- Brick hammer or masonry chisel (for cutting bricks)
- Line and pins (to keep your brick courses straight)
- Measuring tape (for accuracy)
- Wheelbarrow (for transporting materials)
- Bucket (for water and mixing)
- Wooden stakes and string (for marking out the wall’s position)
- Plumb line (for vertical alignment)
Planning and Preparation:
- Determine the Wall’s Purpose:
- Decide if it will be a decorative wall, garden border, or a small retaining wall. This will affect the materials used and the depth of the foundations.
- For simple garden walls, single-brick thickness (one brick wide) is often sufficient. For heavier loads or retaining walls, double-brick thickness may be required.
- Check Local Regulations:
- In the UK, small garden walls typically don’t require planning permission if they are under 2 metres high. However, if your wall borders a public highway, or is over 1 metre, check with your local council.
Step 1: Prepare the Foundations
- Mark Out the Wall Area:
- Use wooden stakes and string to mark out the position of the wall. Make sure it’s the correct length and height, and consider the thickness of the wall.
- Dig the Foundation Trench:
- Dig a trench for the foundations that is at least 150-300mm deep and twice the width of the wall (for example, if your wall is one brick thick, the trench should be around 215mm wide).
- For a small wall (under 1 metre), a depth of 150mm is sufficient. For a larger or load-bearing wall, go deeper.
- Lay the Concrete Foundation:
- Mix concrete in a ratio of 1 part cement to 5 parts ballast (aggregate).
- Pour the concrete into the trench and level it with a shovel or float. Allow the concrete to set for at least 24 hours before building the wall.
Step 2: Mix the Mortar
- Prepare the Mortar:
- Mix 4 parts building sand to 1 part cement, adding a small amount of lime (optional, for flexibility and ease of use).
- Add water gradually to the dry mix, stirring until you achieve a thick, workable consistency (it should be soft but firm enough to hold its shape when applied).
- Test the Mortar:
- It should stick to the trowel when turned upside down but not be too wet or sloppy.
Step 3: Lay the First Course of Bricks
- Lay the Mortar Bed:
- Spread a layer of mortar about 10-15mm thick along the foundation using your trowel. The first course is critical, so take your time to ensure it’s level.
- Position the First Brick:
- Set your first brick at one end of the wall, ensuring it’s aligned with your string line. Use your spirit level to check that it’s perfectly level from side to side and front to back.
- Lay the Remaining Bricks:
- Continue laying the bricks along the mortar bed, leaving a gap of 10mm between each brick for the mortar joints.
- Apply mortar to the ends of each brick (known as buttering) before pressing it against the next brick.
- Check the level of each brick and the alignment with the string line regularly.
- Cutting Bricks (if necessary):
- If you need to cut a brick to fit, use a brick hammer or masonry chisel. Score the brick where you want to cut, then strike it firmly with the hammer to break it cleanly.
Step 4: Build Additional Courses
- Lay the Second Course:
- Begin the second course by starting with a half brick to stagger the joints. This pattern is known as a stretcher bond and is the most common bricklaying pattern in the UK.
- Continue laying the second course, checking that each brick is level and that the vertical joints are offset from the course below.
- Use a Line and Pins:
- Fix a string line between the two ends of the wall (using the pins) at the height of each course to ensure the bricks remain level as you build up.
- Check Vertical Alignment:
- Use a spirit level or plumb line to ensure the wall remains vertically straight (plumb). This is especially important as you build higher.
Step 5: Tidy the Mortar Joints
- Pointing the Joints:
- Once you have completed a few courses, use a pointing trowel to smooth and finish the mortar joints. This is called jointing and helps protect the mortar from weathering.
- For a neat finish, run the trowel along the mortar joints to create a slightly concave surface. This is known as a weathered joint and helps shed water.
Step 6: Add Capping or Coping (Optional)
- Capping:
- To protect the wall from weather damage, you can add a row of capping bricks or coping stones on top of the wall. These bricks or stones are often laid sideways or at an angle to create an overhang, which helps to direct rainwater away from the wall.
- Lay the Capping Bricks:
- Apply a mortar bed to the top of the wall and lay the capping bricks or stones as you would the regular bricks, ensuring they are level and even.
Step 7: Allow the Mortar to Set
- Once the wall is built, leave it to dry for at least 24-48 hours. During this time, protect the wall from rain by covering it with a tarpaulin or plastic sheet.
- Avoid heavy impacts or loads on the wall during this curing period.
Maintenance Tips:
- Check for Cracks: Over time, small cracks may appear in the mortar joints. Repoint any damaged areas with fresh mortar to prevent further deterioration.
- Cleaning: If moss or dirt accumulates on the bricks, clean them with a wire brush or a mild detergent solution.
- Protect from Frost: Mortar can be damaged by frost during the curing process, so avoid building in freezing conditions, or use a frost-proofer additive in the mortar.
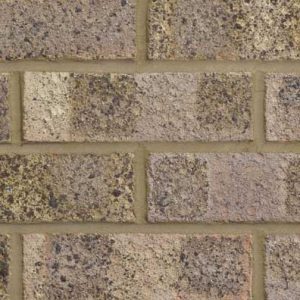
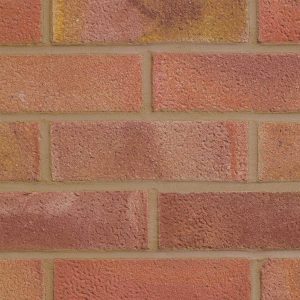
Choosing Bricks for Your Project
- Clay Bricks: These are the most common type of bricks used in the UK, available in various colours like red, brown, and buff.
- Concrete Bricks: Durable and affordable, they are suitable for garden walls and structures that don’t need to match the aesthetics of a house.
- Reclaimed Bricks: For a more traditional look, reclaimed bricks can add character and fit well with older properties or rustic garden designs.
Final Considerations
- Frost Protection: If you are working in cold weather, use a frost-proofer in your mortar mix to prevent the mortar from freezing before it sets.
- Wall Height: Keep in mind that a small garden wall doesn’t typically require reinforcement, but if you’re planning a higher or retaining wall, you may need additional support such as wall ties or rebar.
Building a small brick wall is a manageable task with the right planning and care. Follow this guide to create a sturdy, long-lasting structure that can add both function and beauty to your garden or outdoor space.